Plugins
Find out how you can extend and enhance your website with our simple guide to installing plugins.
Introduction to Plugins
Plugins are small software applications which add new features and functions to your WordPress installation. For example, these apps are built by developers to:
- improve your site’s performance, including how quickly your pages load in someone’s browser;
- secure your site from hackers and malicious bots;
- support your theme’s infrastructure;
- modify the WordPress admin screens and options;
- integrate social media platforms and buttons into your posts;
- add image galleries, advanced blocks and other design elements;
- start an events calendar to let people know;
- design contact forms;
- install eCommerce solutions so you can see products and services to customers around the world; and
- add drag and drop page builders to help you perfect the layout of your site.
You can see why plugins are an essential part of the WordPress ecosystem. Whatever you are trying to achieve with your site, there is a WordPress plugin which can help – you will find over 50,000 of them in the WordPress Plugin Directory.
Installing a Plugin
You can search for free WordPress plugins by clicking the “Plugins” link in the sidebar menu to open the Plugins admin screen.
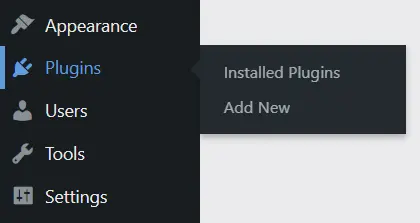
Of course, you can hover over the link and select “Add New” from the submenu, but we are going to look at the main work area first:

The two default plugins that come with a fresh installation of WordPress are not activated, but we have already added a security plugin for this live test site. The options to select, active and delete each plugin is fairly obvious.
The Plugin Repository
To visit the plugin repository, click the “Add New” button at the top of the screen. Your work area should look now something like this:
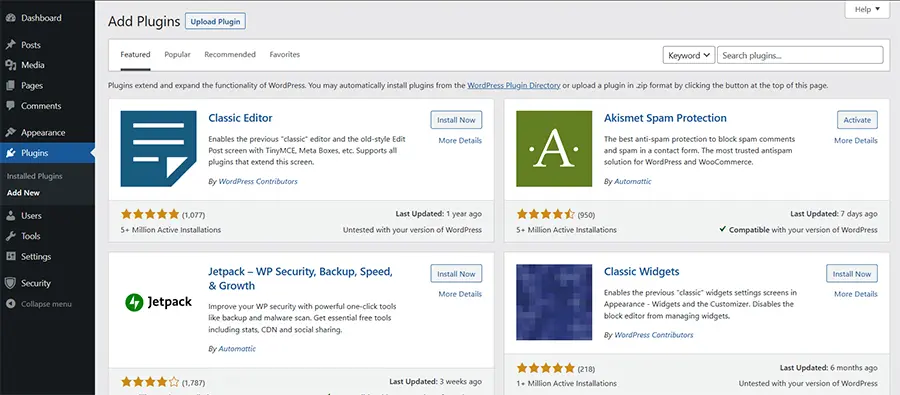
The list of featured plugins will be displayed by default. You can sort the directory by popular and recommended. If there is something in particular you need, type the keyword into the search bar. We recommend you prioritise a security plugin. Here is an example of the search results:
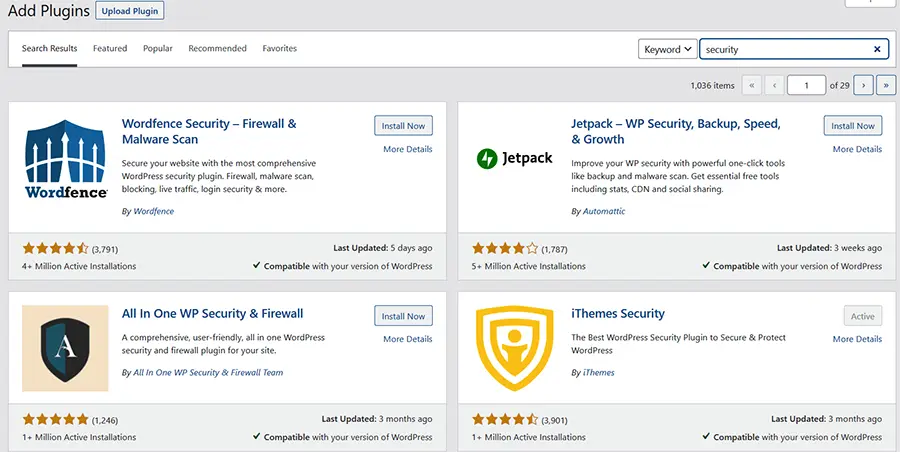
You can see the most popular and highly-rated results appear first. There are plenty of options. Look at the number of active installations, the number of reviews and the star rating, and when the plugin was last updated – this information offer clues to which plugins are still maintained and supported by the developers. Click “More Details” if you want a step-by-step guide to installing the plugin, explore the FAQs, and see screenshots of the plugin in action.
If you are new to WordPress, you should probably opt for a plugin with a huge number of active installations and is regularly updated. However, quantity does not mean quality and user experience.
Once you have decided which plugin suits your requirements, select ![]() and it will be added to your own list. Click
and it will be added to your own list. Click ![]() and WordPress will work its magic and begin activating the plugin. Most plugins are straightforward to install – follow the on-screen instructions and stick to the default options if you are not sure.
and WordPress will work its magic and begin activating the plugin. Most plugins are straightforward to install – follow the on-screen instructions and stick to the default options if you are not sure.
Practice Adding and Deleting Plugins
If you want a quick bit of practice working through this process, try adding and then deleting the Hello Dolly plugin – it was one of the first plugins created in 2005 and has been packaged with every installation of WordPress since to symbolise “the hope and enthusiasm of an entire generation”. When activated you will randomly see a lyric from Louis Armstrong’s “Hello, Dolly” in the upper right of your admin screen.
Once you are are done, you can delete the plugin from your files because it serves no purpose other than connecting new users to the origins of WordPress.
Further Reading
You can learn more about how plugins relate to other aspects of the software’s ecosystem by reading our introduction to WordPress. It is certainly worth considering the impact of themes on your site’s overall look and feel.