
Collage Identity Task
Develop your knowledge of the layers panel and work with layers to create an engaging collage.
Introduction
Photoshop can be incredibly scary when you are using the software for the first time. The more you practice using the various features, the more you will become comfortable navigating around all the menus, editing tools and panels.
In this exercise, we are going to design a collage that expresses who you are through images of media, culture and interests.
A collage is a combination of different elements into a single composition. This used to mean piecing together photographs, sketches, illustrations, coloured paper and textures onto a sheet of paper for display. Our digital version will help you develop your ability to work with layers and add layer styles.
Contents
Create a New Document
If you have just opened Photoshop, you can create a “New file” by clicking on the blue button on the left side of the home screen. You can also select “File” on the main menu at the top of screen and then select “New”. Or press Ctrl+N on your keyboard at the same time. Mac users should press Cmd + N.
All these options open the “New Document” window.
Select “Print” from the row of tabs and then look for the A4 preset. Keep the default settings but change the name of the file in the “Preset Details” box. We went with “media studies collage”.
Left click the blue “Create” button and your canvas is ready.
Insert Your First Image
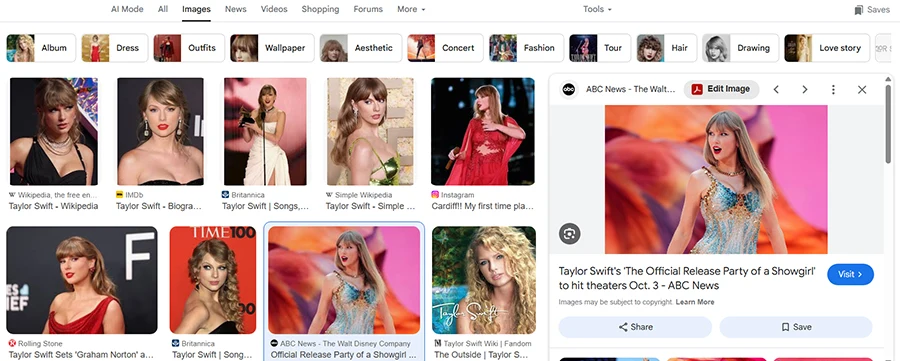
Open your browser and type in your first query. We searched for the incredibly popular Taylor Swift.
If you are using Google, filter the search by image and make sure you select “Tools > Size > Large” to return good quality files.
It is important to note search engines display thumbnails in their results and not the full image. We need the version with highest quality so left click the image you want to use in your collage to open the preview panel with the image, details and source link.
Right click on the image and select “Copy image”.
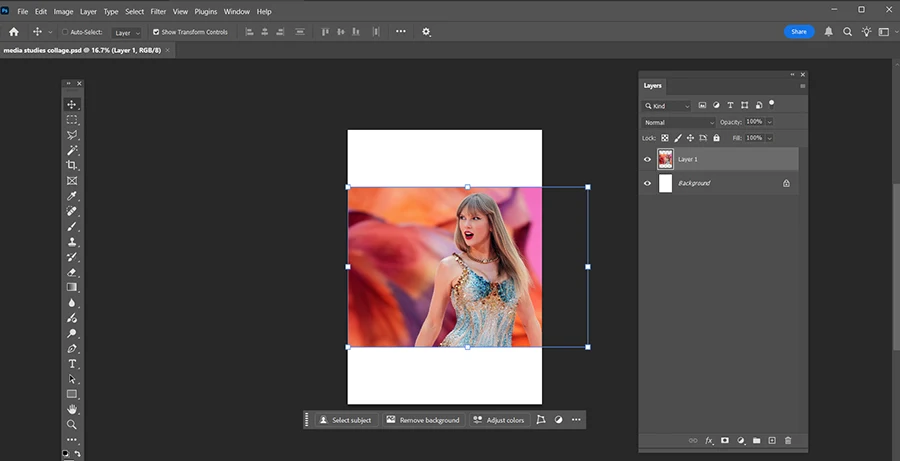
Go back to Photoshop and paste the image by pressing Ctrl+V (Windows) or Cmd+V (Mac).
Rename The Image
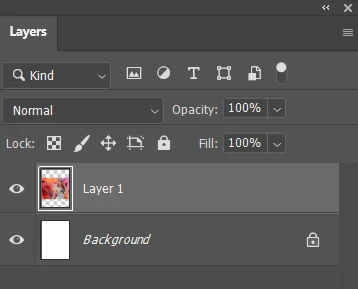
Photoshop will automatically add a new layer when you paste an image into the work area. You can see the software labelled our image “Layer 1”. This can get very disorientating when you are combining lots of layers, so make sure you give them specific names.
Take a closer look at the Layers panel. The light grey background signifies which layer is currently selected. Any edits you make, such as moving and transforming the element, will only affect this active layer.
The eye icon toggles the visibility of the layer. Click the icon and the layer will become invisible. This can be useful when you need to concentrate on specific elements.
The thumbnail helps you identity the type of layer.
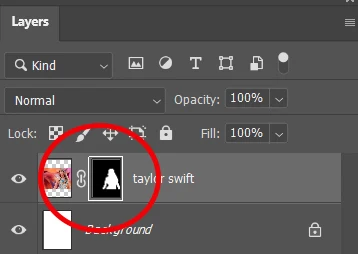
Double-click directly on “Layer 1” and the text will become highlighted. Type in the new name and press “Enter” to confirm the change. We just typed “taylor swift”.
You can also right-click on the tab and select “Rename Layer…”
Remove the Background
You can easily remove the background by selecting the “Remove background” option from the contextual tool bar. After the software processes the request, you will see a new thumbnail appear beside the original. This is the layer mask thumbnail, and it reassures the user that the original layer remains unedited.
Right click on the thumbnail to disable and enable the mask.
Now use the move tool to reposition your first image. The shortcut is simply V on your keyboard.
Add More Images
Select at least another ten images that connect with your identity. You can add instruments you play, hobbies, film posters, the sports team you follow, places you have visited, your school and anything else that expresses your personality and experiences. You can even add your own photographs.
Pick pictures with bold, clear colours so they stand out on the collage and encode your energetic personality. Use dark and pale images if you want to convey that mood. Some contrast will add depth and variety to your product.
Look out for images with plain backgrounds because they might be easier to add to your collage. However, an image with plenty of negative space might provide an effective background.
Make sure you check the image quality because files less than 800px wide will blur and pixelate when resized.
Editing the Images
All the layers are visible, but we only want to work on one of them. Hover the cursor over the eye icon of the image layer. This time press alt on your keyboard when you left click. You should now only see the layer you want to edit.
If you were making a physical collage, you would need to use scissors and glue to piece the images together. The “Remove background” feature is the digital version of this process.
Lasso Tool
Alternatively, you can use the Lasso tool ![]() for a less precise cut. It is the third option down in the toolbar. The default might be the Polygonal Lasso tool, so right click the icon and select the Lasso tool instead. The shortcut is L.
for a less precise cut. It is the third option down in the toolbar. The default might be the Polygonal Lasso tool, so right click the icon and select the Lasso tool instead. The shortcut is L.
Hold down the left mouse button and drag the tool around the object. In this example, we drew around Zelda from Echoes of Wisdom to select her character and some of the setting. Importantly, we want to delete the other parts of the image, so we need to inverse the selection. You can do this by going to “Select > Inverse selection” on the top menu. You should see the lines shift to take account of the space outside the part of the layer you want to keep.
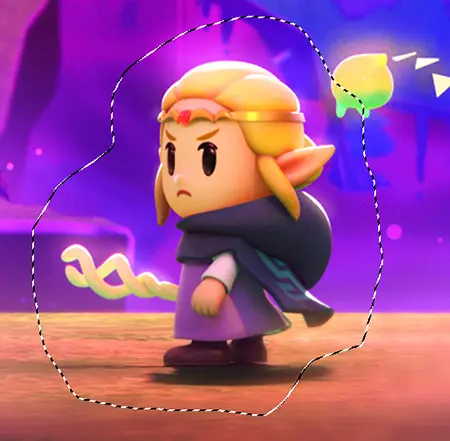
Press delete and the area you wanted to keep will remain. The process is tricky so try it a few times until you get it right.
Once you are satisfied with the result, press Ctrl+Dto deselect the area. Do not skip this bit!
If you are already comfortable using the software, right-click on the layer in the panel and convert it to a Smart Object so you can preserve the original pixels and image quality while you edit the element in a new tab.
Drop Shadow and Outer Glow
The layers will sit on top of each other, so you can add a drop shadow to give your collage a three-dimensional quality and make the images pop out. Double-click on the empty space to the right of the layer’s name. This will open the Layer Style window.

You can tick the option for the drop shadow at the bottom of the panels to apply the default or your preference to the layer. Click the panel instead to reveal the full work area. Try decreasing the opacity for a more defined shadow.
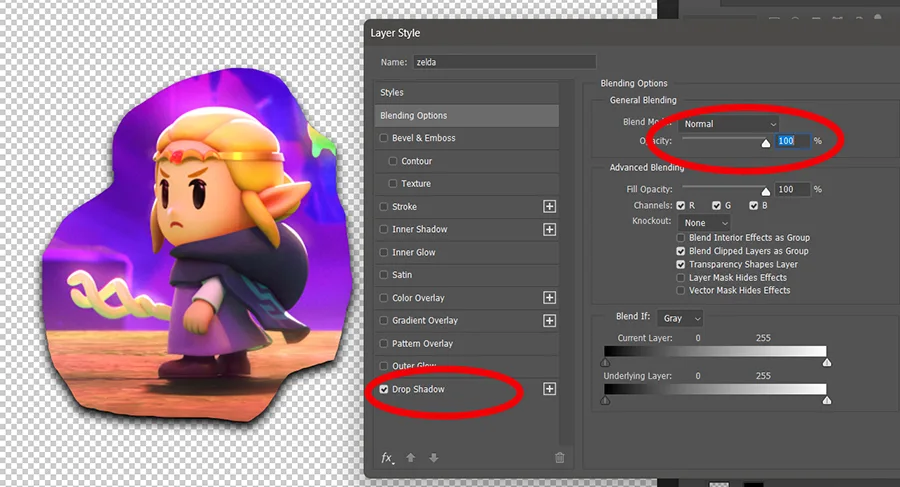
The outer glow style will also help separate and layer the images. Play around with the size and spread options. Change the colour of the glow. You are not trying to make the final result aesthetically pleasing. You just want to become more comfortable using Photoshop.
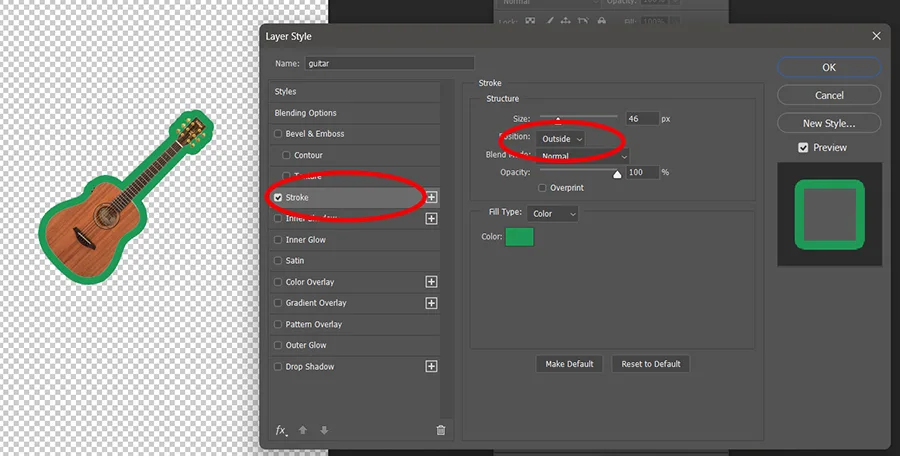
Stroke
Stroke is another effect you can apply to the image in the Layer Styles panel. From the “Position menu”, chose “Outside” to add a border to help define the image in the collage.
Make Your Collage
When you are ready to edit the next image, make sure you select the correct layer in the panel. Remember to look for the light grey highlighting the current layer.
Use the move tool to get the images into the right position.
Free Transform
Resize and rotate your images to perfect your collage.
Press Ctrl+T to start the transformation. The current layer will now be boxed by lines connecting squares around the edges. When you hover the cursor over the one of the corners, you will notice it changes to a curve with arrows. This new icon lets you know the layer is ready to rotate. Hold down the left mouse button and drag the image to the angle you want. Prese Enter to confirm.
You can also apply a specific angle in the options along the top of the screen. This is incredibly useful if you want a precise rotation.

The fields marked “W” and “H” refer to the width and height of the layer. You can use these to resize your images. For example, type in 50% in one of the fields and your image will be half the size of the original. When the chain icon is active, the layer will maintain its ratio when you change the value of the width or height.
Add a minus the horizontal field to reverse the image. This is a simple way to point your layer to the opposite direction. A minus in the horizontal field will flip the image upside down.
Layer Order
Once you have transformed and styled all your layers, you need to think carefully where they will appear in the collage and which ones will sit on top and behind the others. Hover your cursor over a layer and the icon will change to hand with the index finger pointing up. Press and hold the left mouse button on a layer and drag it up or down.
The Layers Panel is like a stack of transparent sheets of paper. The top layer in the panel is the sheet on top of the stack. The bottom layer in the panel is the sheet which appears behind everything else.
Pay attention to how the layers are ordered in the panel and how this connects to the images on the canvas.
Final Thoughts
Layering and positioning images takes a little time and effort. Students often struggle with layer order because you only see the finished composition on the canvas and not the stack of layers.
Your edits may not work as expected because the wrong layer is highlighted, so make sure you appreciate the relationship between the Layers Panel and the layers on the canvas.
Think carefully about which layer you want to edit and then select the correct one in the panel.

This task was inspired by David Gauntlett’s approach to understanding how the media offers us “tools” to construct our identity. Hopefully, it has also given you a chance to develop your Photoshop skills.