The Type Tool
Practise your skills using the type tool in Photoshop and learn how to improve the presentation of text in your coursework.
Introduction
If you have read our overview of the Photoshop interface in the previous article and want to become more familiar with the program, this first lesson focuses on using the type tool and the character panel. By writing and modifying lots of text into a tag cloud, you will also get to practise using the options menu and transform tool.
The task is long but straightforward – you are going to create a tag cloud full of media studies terms. Let’s get started.
Contents
Open a New Document
When Photoshop launches, you will be prompted to create a new document or open a recent file. Click the create new button. You should now see a range of presets in the dialog box. These are useful if you are designing a banner for a website, wallpaper art for your phone, or a title card for a video production. Depending on your subscription, you might even be able to download a few templates.
Pick the A4 Print preset (210 x 297 mm at 300 ppi) because it will be easier to print your work if you want to keep track of your progress.
Clear Your Workspace
For this exercise, you are going to use the type tool to create lots of text which will then need to be organised in the layers panel and modified using the editing tools available in the character panel or options bar. Clear your workspace by closing some of the unnecessary tab groups. Right click on individual tabs to reveal the option to remove them.

You can then resize the layers panel and move it to a more convenient location if necessary. This new and clutter-free workspace should help you focus on the key aspects of this task
Select the Horizontal Type Tool
The toolbar is probably docked on the left of your screen. The horizontal type tool ![]() is located towards the bottom of this panel. If you want to use the shortcut, press t on your keyboard.
is located towards the bottom of this panel. If you want to use the shortcut, press t on your keyboard.
Create a Text Layer
Move your cursor over the canvas. Press and hold the left mouse button to create the text layer. Still holding the button, drag the mouse across to define the width and height of the layer. Do not worry about the size for the moment.

In the most recent versions of Photoshop, when you let go off the mouse button, the program automatically fills the layer with dummy text. This can be quite shocking, especially if you have never seen “lorem ipsum” in use before. The words are simply a placeholder used by designers to demonstrate what the writing will look like once you have finished typing your actual content. This Wikipedia entry provides some background on its history.
Anyway, to stop text layers from auto-filling, go to the main menu bar at the top of your screen and select Edit > Preferences > Type. This will open a new dialog box where you can untick the feature “Fill new type layers with placeholder text”. However, we would recommend you use this function when you are building columns for print productions such as newspaper articles or magazine spreads. It can get annoying when you are only creating headlines and subheadings.
Use the Move Tool
To move a text layer around the canvas, select the move tool ![]() from the very top of the toolbar. The shortcut is simply the v button on your keyboard.
from the very top of the toolbar. The shortcut is simply the v button on your keyboard.
Modify a Text Layer
Before you create another text layer, look at the various editing tools now available in the options bar at the top of the screen. In the following example, the typeface Times New Roman has been selected with a regular weight and size 14 font. The text is left aligned and black in colour.

Change it to a more modern font family, such as Arial or Roboto, from the dropdown menu. Set the font style to bold and change the value of the font size to 16pt. If you click the colour icon, the color picker box will appear. Choose red or any other colour you prefer.
If the text was highlighted in the layer, it will change each time you select one of these options.
Remember, you can select a layer in the layers panel by left clicking to the right of its name. If want to highlight the text in the layer, double click the thumbnail. For text layer, this will be a T icon.
Try changing the colour each time you create a new text layer.
Rotate a Text Layer
When the layer was active, you may have noticed the thin dashes and, importantly, the eight squares positioned at key points around the path. Press and hold the left mouse button to resize the layer.
However, hover over one of the corners until the cursor changes to curved arrows. You can now rotate the text layer to any angle. Mess around with this feature until you are comfortable moving the mouse. You can even try to make the text a mirror image of the original version by flipping the layer path.
Free Transform
For a more precise rotation to a specific angle, it is better to use the free transform function. Select Edit > Free Transform from the main menu. The shortcut is Control+t (Windows) or Command+t (MacOS)
A new set of options will appear along the ribbon at the top of the screen. Look for the angle icon ![]() and type in 90 or -90 to rotate the layer by those values. Again, play about with the feature to produce some unusual text layers.
and type in 90 or -90 to rotate the layer by those values. Again, play about with the feature to produce some unusual text layers.
When your canvas becomes too cluttered, you can always close the document and practise opening a new file.
The Character Panel
Time to get serious. Select Window > Character from the main menu bar to open the character panel. In this new box, you can adjust the font and size, but you can also modify the leading, tracking, kerning, and vertical and horizontal scale of the text.
If you have read our magazine glossary of key terms, you might already be familiar with these terms. In summary:
- Leading refers to the distance between the baselines of two lines of type. In other words, the gap between each line.
- Kerning is the distance between individual letters or characters. The smaller the value, the smaller the gap. You can even make letters overlap.
- Tracking refers to the density of letters on the line and the space between words.
- By changing the vertical and/or the horizontal scale, you can stretch and pull the size of the letters.
In this example, the font family is Arial and the regular weight has been selected. Font size is 16pt. The lead is 36pt, which will create a noticeable gap between the lines of text. The kerning has been changed to zero, but you should really keep the default metrics setting. Tracking has been adjusted to -25 so the letters will be closer together. The letters are scaled vertically by 150% and scaled horizontally by 200%. The colour is black. Finally, Photoshop will force the text into a bold weight. This text will look absolutely awful so please do not copy these settings.

Have lots of fun playing with these values and create some bold and eye-catching text layers. This is also the best way to be more comfortable using these terms.
The Word Cloud
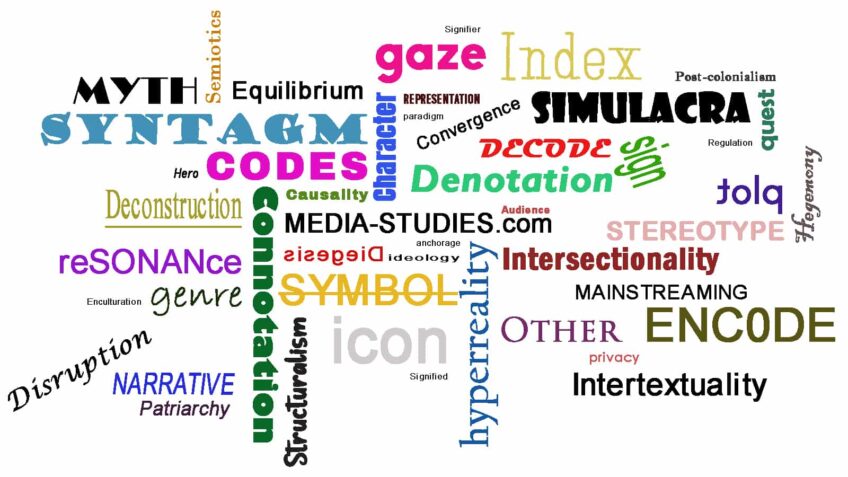
With plenty of practise using text layers and making adjustments via the options menu and character menu, you are now ready to design your word cloud. Use the following media studies in your response to this task.
Media Studies Terminology
Anchorage
Audience
Causality
Character
Codes
Connotation
Convergence
Cultivation
Decode
Deconstruction
Denotation
Diegesis
Disruption
Encode
Enculturation
Equilibrium
Framing
Gaze
Genre
Hegemony
Hero
Hyperreality
Icon
Identity
Ideology
Index
Intersectionality
Intertextuality
Mainstreaming
Myth
Narrative
Other
Paradigm
Passive
Patriarchy
Plot
Post-colonialism
Privacy
Quest
Regulation
Representation
Resonance
Semiotics
Sign
Signified
Signifier
Simulacra
Stereotype
Structuralism
Symbol
Syntagm
Villain
Conclusion
Your ability to manipulate text layers is incredibly important when it comes to designing visually appealing headlines in print productions. You also need attention to detail when you are creating columns for a magazine spread that has lots of copy. If you found this tutorial useful, you should look at how to modify shapes in Photoshop in our next lesson.
One final tip: when you opened the character panel, the paragraph panel may have also appeared on your screen. You can change the alignment or indent the paragraph from this panel. Importantly, make sure you untick the hyphenate box before you start writing your main copy.