The Rectangle Tool
Practise using the rectangle tool in Photoshop and become more confident transforming and modifying layers.
Introduction
In this lesson, we are going to demonstrate how to use rectangle tool and the various editing features available in the option bar and properties panel. By arranging and rearranging coloured rectangles into the flags of the world, you will also get to practise organising the items in the layers panel.
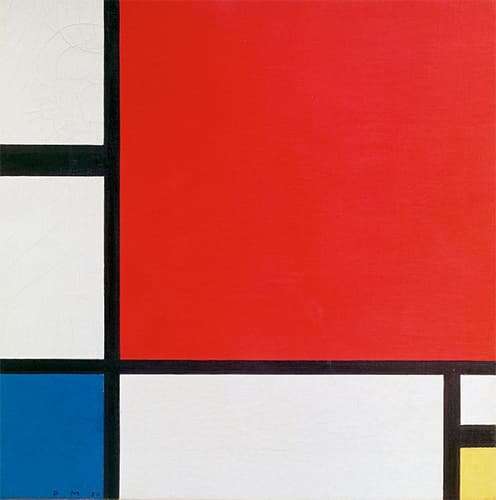
The final task is to create your very own Mondrian painting. Interested? Let’s get started.
Contents
Setting up your Workspace
If your worked through the previous lesson on using the type tool, you will know how to open a new document with the A4 preset. This canvas size is useful if you want to print out your work to record your progress.
For this exercise, you are going to use the rectangle tool to create lots of shapes which will then need to be organised in the layers panel and modified in the properties panel. Clear your workspace by closing some of the unnecessary groups and tabs. Leave the layers panel open on the screen.
Select the Rectangle Tool
The toolbar should still be docked on the left of your screen. The rectangle tool  is located at the bottom of this panel. Remember, if you can’t see the icon, right click on the button to bring up the related tools. The rectangle tool should now be available.
Draw a Shape
Hover your cursor over your document. Click and hold the left mouse button. Now, drag the mouse to draw a rectangle. Try this movement a few times to get used to the process.
Modify the Shape
Immediately after you draw the rectangle, you should see the on-canvas controls around the shape’s path. In the example below, look closely at the eight boxes positioned on the rectangle’s corners and in the middle of the lines.
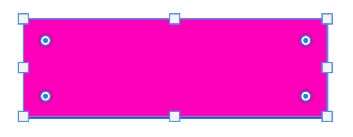
Hover your mouse over one of these areas and the cursor will change. You can now hold down the left mouse button and resize the height and width of the rectangle. It is also possible to round the corners of the rectangle by moving the circle icons inside the shape.
Draw lots and lots of rectangles. You can always close the file and practise opening a new document.
Top tip: hold the shift button down when you are resizing the rectangle and the shape will maintain the ratio between the width and height.
Importantly, if you want to simply move the rectangle to another part of the canvas, press v on your keyboard to activate the move tool ![]() . You can then use your mouse to reposition the rectangle.
. You can then use your mouse to reposition the rectangle.
The Properties Panel
When you were drawing the shapes, you may have noticed the properties panel automatically appears on the screen. This panel offers a range of options to modify the layer. The W and H values in the following example define the width and height of the rectangle. The X and Y are coordinates that locate the shape on the page. The fill is pink and there is an unfashionable 1px black stroke running around the edge of the rectangle.
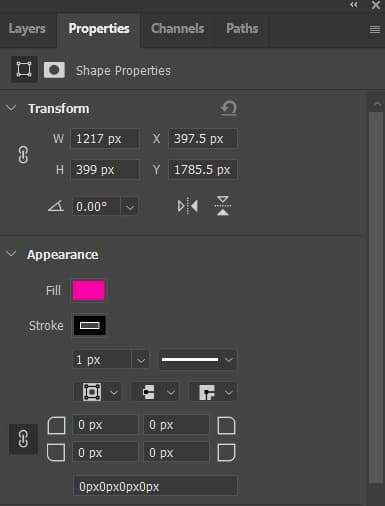
Photoshop usually applies this stroke as part of its default settings. Make sure you change it by choosing the no colour icon:  .
.
The final section of the properties panel focuses on rounding the corners of the rectangle. You can modify the radius of each corner separately but the values have been linked in this example.
You can also change the colour of the rectangle or add a stroke from the options bar at the top of the screen.

Have fun drawing more rectangles and mess around with their fill colours. Create some weird and wonderful shapes on the canvas.
Rotate the Rectangle
Hover the mouse over one of the corners of the rectangle until a curved arrow icon appears. By pressing and holding your left mouse button, you will now be able to rotate the shape. Again, test your skills by changing the angle of your rectangles.
If you use Photoshop’s transform feature, you can add a precise value into the angle field ![]() in the options bar. The shortcut for transform is Control+t (Windows) or Command+t(MacOS)
in the options bar. The shortcut for transform is Control+t (Windows) or Command+t(MacOS)
Task One
Using the skills you have developed so far in this tutorial, open a new document in Photoshop and create a French and Irish flag.
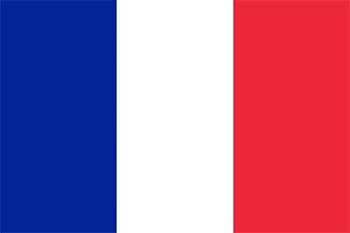

For each flag, create three rectangles. Try duplicating the layers. This is a good way to keep the same dimensions of each shape.
Task Two
For this exercise, you are going to use Photoshop to draw a Union Jack, one of the best known flags in the world. This task is a little more challenging because you will have to rotate the rectangles and make sure each shape is in the right order in the layers panel.

Task Three
Piet Mondrain is probably most famous for his grid-based paintings. With your knowledge of the rectangle tool, you should be able to reproduce the black lines, white squares and primary colours which are typical of the artist’s work.
Conclusion
Solid-coloured rectangles are really useful when they are placed behind text to make the writing stand out on the page. They can help draw attention to infographics or add an interesting dynamic to a photograph. Even if you don’t use the tool in developing your coursework, you should now be more comfortable using Photoshop, especially transforming and modifying layers.
Before you look at our next lesson, which focuses on combining text and images in Photoshop, you might want to practice navigating around your Photoshop files.

